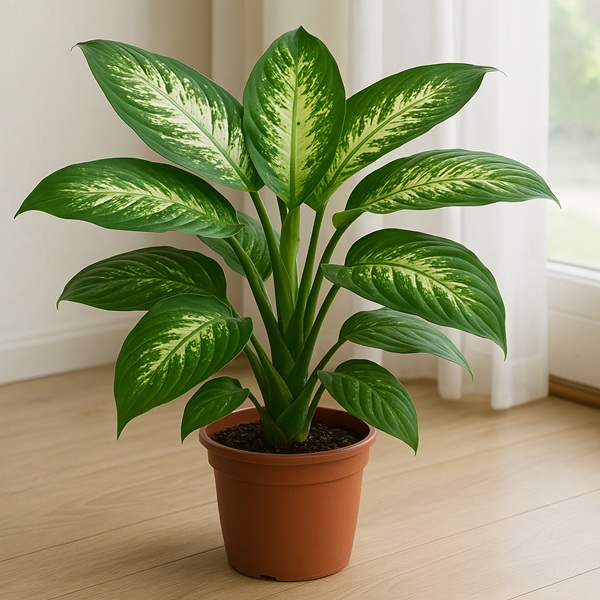
Dieffenbachia has long held an honored place in Ukrainian homes, offices, and public institutions. It is a plant capable of instantly transforming an interior thanks to its large, striking leaves, where dark green and creamy white shades blend harmoniously. Despite its tropical origin — dieffenbachia naturally grows in the forests of South America — it adapts well to indoor conditions in Ukraine when given proper care. Still, for the plant to maintain its ornamental beauty and develop actively, it is important to understand its basic needs: light, temperature, humidity, and environmental stability.
First of all, lighting should be highlighted as one of the decisive factors. Dieffenbachia prefers bright, diffused light, but direct sunlight — especially at midday in summer — can scorch its delicate leaves. If you grow the plant on the south side, shading is essential. Light curtains, blinds, or simply placing the pot deeper into the room will work well. The ideal option is an east- or west-facing window. Northern windows, however, may be too dark, especially in winter, which leads to slowed growth and loss of leaf contrast.
Temperature is another key point. Dieffenbachia loves stability. The optimal range is from +20°C to +26°C, without sudden fluctuations. During the cold season, especially in unheated rooms or in places exposed to drafts, the temperature should not fall below +15°C. Here are a few rules worth following in Ukrainian conditions:
avoid drafts — during airing, it is better to move the plant to another room;
do not place the pot right against the window glass in winter, because the surface transmits cold;
do not keep dieffenbachia above radiators or near heaters, since dry heat damages the leaves and encourages pests.
One more important point: the plant reacts poorly to frequent relocation. Once you have found a suitable place for it, try not to move it unnecessarily. Every change of surroundings is a stress that affects its appearance and overall condition.
Many beginners do not attach much importance to repotting, seeing it as just a technical procedure. But for dieffenbachia, timely and proper repotting is the foundation of full development. Its root system grows actively, while the substrate gradually compacts and loses air permeability. This is especially important in Ukrainian conditions, where indoor air is often dry in winter and windowsills may overheat in summer.
Signs that the plant needs repotting:
roots are growing out through the drainage holes;
water either stops soaking into the soil or, on the contrary, the soil dries out too quickly;
a white coating appears on the surface of the substrate;
the dieffenbachia has stopped growing despite proper care.
The best time for repotting is spring or early summer, when active growth begins. The pot should be chosen according to the size of the root system: slightly larger than the previous one and definitely stable. Ceramic pots or strong plastic containers with drainage holes are ideal. Dieffenbachia is a large plant, so an unstable pot can easily tip over.
As for soil, dieffenbachia needs a light, moisture-permeable, loose substrate. The optimal mix is:
1 part leaf soil;
1 part peat;
1 part humus;
½ part sand or perlite.
Before use, it is best to steam the mix or treat it with a weak potassium permanganate solution to reduce the risk of fungal infection. A drainage layer, such as expanded clay or pebbles, must be placed at the bottom of the pot. Repotting is best done by the transshipment method so the roots are not damaged. After repotting, watering is postponed for 1–2 days to give the plant time to adapt.
Dieffenbachia is a moisture-loving plant, but it does not tolerate waterlogging. It is better not to follow a rigid schedule, but to judge by the condition of the soil: the top layer should have time to dry slightly between waterings. In spring and summer, watering is usually done every 3–5 days; in winter, once every 7–10 days. The water should be soft, at room temperature, and preferably settled or filtered. In many regions of Ukraine, tap water contains hardness salts that gradually accumulate in the soil and worsen its structure.
Air humidity is another critical factor, especially in winter. Dieffenbachia feels comfortable at humidity levels of 50% and above. If the air is too dry, the tips of the leaves begin to dry out and the plant loses its shine. To raise humidity, people use:
air humidifiers;
wide trays with wet pebbles;
grouping plants together;
spraying the air around the plant, though not the leaves themselves in winter.
Dieffenbachia is fed during the active growth period, from April to August, twice a month. Liquid complex fertilizers for ornamental foliage plants with a high nitrogen content are used. From September, feeding is gradually reduced, and from November it is stopped completely. It is important to fertilize only moist soil, otherwise the roots may burn.
A useful tip: do not forget to clean dust from the leaves. Wipe them weekly with a soft damp cloth — this improves photosynthesis and reduces the risk of pests.
With age, dieffenbachia loses some of its fullness: the lower leaves turn yellow and fall, and the stem stretches, leaving a bare section. This is a natural aging process, especially in large specimens that are more than 3–4 years old. But there is no need to throw such a plant away — it can be successfully rejuvenated. For that, you need to know how to prune dieffenbachia correctly and what conditions to provide afterward.
The best time for pruning is late spring or early summer, when the plant is actively growing and regenerates easily. The stem is cut with a sharp, sterile tool, leaving about 10–15 cm above the soil surface. The fresh cut is treated with charcoal or cinnamon powder to prevent rotting. Important: pruning releases milky sap, which is toxic, so you should work in gloves, and the cut pieces must not be left where children or pets can reach them.
What should be done with the top? It can be rooted. Step by step:
let the cut dry in the air for 1–2 hours;
place it in moist sand, peat, or simply in a jar of water;
cover it with film or a jar to create a greenhouse effect;
put it in a warm, bright place without direct sunlight.
Roots usually appear within 2–4 weeks. Once 2–3 strong roots have formed, the plant can be transferred to regular soil. The part left in the pot, the so-called stump, usually remains viable as well — side shoots will appear over time, and the plant will rejuvenate naturally.
So pruning is not only a way to restore an attractive appearance, but also an opportunity to get new plants for yourself or as gifts. If rejuvenation is repeated every 3–4 years, your dieffenbachia will always look luxurious.
Dieffenbachia can be propagated in several ways, and each has its own advantages. The main thing is to choose the right method and the right time. Indoors, the most common methods are rooting top or stem cuttings and using air layering.
Cuttings, either top or stem.
The top shoot removed during pruning roots easily in a light peat-based substrate or in water. Another option is to cut the stem into sections 10–15 cm long, each containing at least one internode. These pieces are laid horizontally on moist sand or perlite and pressed in slightly. Once shoots and roots appear, the cuttings are transplanted into permanent pots.
Air layering.
This method is suitable for old plants with a bare trunk. A shallow cut is made in the internode area, wrapped with moist sphagnum moss, and then covered with plastic. Roots appear in 2–4 weeks. After that, the stem is cut below the rooted section and the new plant is potted up.
Useful advice:
always wear gloves before any manipulation, since dieffenbachia sap irritates the skin;
do not leave cuts exposed for longer than 3–4 hours;
provide good ventilation, since this reduces the risk of rotting;
do not rush into repotting, because young plants need stability during their first weeks.
In different regions of Ukraine, rooting methods may vary a little: in the south, glazed balconies can be used in spring, while in the north, only indoor rooms with controlled temperatures are suitable. No matter the method, propagation is an excellent chance to refresh your collection and create plants for sharing, gifts, or further greening of your space.
Despite its general resilience, dieffenbachia can suffer from a number of diseases and pests. Most often, this is the result of improper care: overwatering, lack of light, sharp temperature fluctuations, or excessively dry air. All these factors weaken the plant’s immunity and make it vulnerable.
Main diseases:
Root rot.
The cause is stagnant water. Symptoms include wilting, unpleasant odor, and black or brown roots. Treatment involves cutting away affected parts, repotting the plant, and treating it with fungicides.
Gray mold.
It develops under excessive moisture and poor ventilation. A gray fluffy coating appears on the leaves. The affected leaves must be removed and the plant treated with products such as Fundazol.
Powdery mildew.
A white powdery coating appears on the surface of the leaves. It can be treated with a solution of baking soda and soap or with specialized preparations.
Leaf spotting.
This may be infectious or caused by burns. It can only be dealt with properly once the source of the problem has been identified.
Pests:
Spider mite.
It spreads in dry air. The leaves lose their shine and webbing appears. Regular humidifying, washing the leaves, and insecticides such as Fitoverm are effective.
Scale insect.
These appear as small brown plates that feed on plant sap. They are removed with alcohol wiping and treatment with Actellic.
Thrips.
They cause leaf deformation, discoloration, and silvery spots. Control requires thorough treatment with several preparations.
Prevention includes:
a quarantine period for new plants of at least 10 days;
regular wiping of the leaves;
maintaining the correct watering routine;
ventilation without drafts.
With attentive care, dieffenbachia can remain healthy, decorative, and trouble-free for years, even in Ukraine’s difficult transitional seasons. All it takes is a little attention — and it will respond with abundant foliage and steady growth.